Showing posts with label porcelain plank. Show all posts

Wednesday, October 15, 2014

Black is the New Black…the sequel


Over my time writing this blog, the post that has been read and shared the most is by far Black is the New Black.  Wood look tile is a highly debated topic on home websites such as Houzz, HGTV, and various blogs.  After nearly a year of living with our wood-look tile, I have decided to revisit my post from a year ago.  This post will be my opinion based on my experiences.

When it was time for us to make a flooring decision for our new home that we were remodeling, we really wanted wood.  We had some major concerns with adding real wood though 1.) we have two young, rambunctious boys 2.) we live in Florida where heat and humidity are a problem 3.) we have a pool and water is frequently tracked through the house.  Given these concerns, we decided that wood was not in our best interest.  After a long search, we went with Marazzi American Heritage porcelain planks in the color spice.  We have been living with this tile for nearly a year and I would like to address some of the most frequent questions that I get about wood look tile floors.

1.)  Does it feel like real wood?  No, tile is naturally harder than wood.  Because of this, it is more durable, but it can be harder on your feet and back.  It also does not absorb sound like wood.  It feels and reflects sound just as regular tile does, because it is porcelain.

2.)  Many people have figured out that the longer planks look more like wood.  Our planks are 6x36".  A frequent question is: Are the longer tiles more likely to fracture and fail?  In the year that we have been living with our tile, we have had no problems with cracks or breakage.  Our tile guy really took his time prepping the floors and laying the tile correctly.

3.)  Are the expensive tiles really worth more than the more inexpensive versions?  In my opinion YES, for multiple reasons.  First, to achieve a more realistic look, longer tile planks tend to look better.  Inexpensive tile are generally 6x24" and the longer the plank, the more expensive they run.  Second, if you want minimal grout line, as we did, you will want rectified tiles, which will increase the price.  Rectified tiles can be placed with a 1/16" grout line.  Finally, many of the more expensive tiles are color body tiles, so if they chip, they will be brown straight through instead of having a white patch where the chip occurred.

4.)  How do I know which grout color to choose?  Ask your installer to show you some test patches.  This really solidified our decision when we saw several samples next to each other.  Many of the brown grouts that looked dark on the color swatches, appeared much lighter when they were put down next to the tiles.  Spend the extra money and do a test sample of the grout.  The piece of mind was worth every extra cent to us.

5.)  Is the tile cold?  It can feel much cooler than wood.  For us, this was actually a benefit as we live in a warm climate.  If you are living in a cold climate, you may want to consider heating under the tiles. 

6.)  Would you choose this again?  Definitely.  I have seen unthinkable things happen to this floor and it still looks great.  One morning we woke up to find our freezer had broken and water was sitting on the floor all night.  Real wood would have been a goner less than a year after install.  Thank God it was tile and we just wiped the mess up.  My boys crash cars in the tile, spill food, even get marker on it and we never have problems.


And now for the photos.

First, I will show you the evidence for choosing tile:


This is real wood in our home, and this is the reason we chose tile.  When we bought this 7 year old home, it came with this lovely patch of wood that had been ruined by a leaky window.  
Warped boards from sitting water and discoloration.  Bummer.  Total bummer.


Now, the wood look tile, which runs through most of the main living areas in our home.  I think it looks very much like real wood and gives the look I was going for in our decorating.  

As you can see, our grout lines are minimal at 1/16".  We chose a black epoxy grout, which is easy to clean and has a lovely uniform color.

Close up of our wood look tile with the black epoxy grout.

This is a photo of the room in our home that has real hardwood.  This is the reason we chose the black grout.  The lines between the planks are dark and I think the grout we chose give our tile a very similar look.  

Here are some larger sections of the tile to give you an idea if how it looks throughout the room.
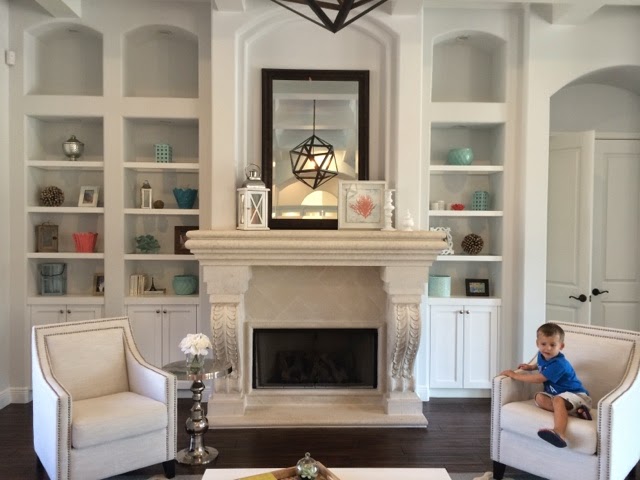
Living room in full sun.


The wood look tile really pulls the room together and many of our guests don't even know it is not wood.

Finally, to wrap things up, here is a short video clip to show why I am so pleased with our choice of tile.  My boys can be boys and I don't have to worry about scratches or damage!


Monday, October 13, 2014

Some Finishing Touches


It has been a while since I posted much.  After the initial flurry of work and large projects that were being done, the finishing touches took much longer to complete (and some are still a work in progress.) I thought it was time to update and share what things look like now.  In one and a half months, we will have lived here a year.  *Note:  These are all iPhone photos, so the quality is not fantastic, but I am a busy momma.*


Family Room

I spent a lot of time not knowing what to do with our built-ins.  The art nook was so large and the shelves just adjacent to it really had the potential to make the room look over-cluttered.  I was struggling for a long time to make it look put together, but still crisp and clean with a little bit of fun.  

We had this photo of our family enlarged and printed on canvas at Great Big Canvas.  The lighting is from Restoration Hardware and the sectional sofa is from Macy's.  The chevron rug is from Rugs USA.  
A closer look at the shelving and nook.
One thing I did to keep the look clean was to buy a large roll of white butcher paper and wrap hardback books from the local Goodwill Book Store.  It was a cool way to add height to some of the smaller design elements that I had found as well.  


Panoramic from the kitchen to the family room.


Kitchen

We added a lot of glass front cabinets up high that I struggled with for a long time.  The contractor was supposed to install lighting in these cabinets, but he never completed it and it is too difficult to do retroactively.  Many of the things that I tried to put up there looked to dark and things weren't working well.  One day, I stumbled across this article on Facebook about a woman who spry painted cheap glass objects from the dollar store to create cheap centerpieces.  I decided that this could be an easy way to find objects that looked cohesive in so many glass windows.  I gave it a try and the results were great. 
( Pendant lighting from Pottery Barn)
These are all random items front the Dollar Tree spray painted.  The job took one day and I have had so many compliments on it.  Everyone is shocked when I tell them that these are all from the Dollar Tree and the project only cost around $30.  (Unfortunately, between the dark evening hours and the reflection from the glass, my photos aren't turning out great.)  More info about the kitchen available in this previous post.

Living Room

The living room is my favorite room in the house.  I feel so relaxed and refreshed when I am in here.  I sit in this room every day when Little Two is napping and I pull myself back together after ran me ragged all morning.  
This room is a breath of fresh air, if you ask me!  Ahhh!  
As mentioned in previous posts, we added the coffered ceiling detail, painted the cabinets and had new doors and shelves made, painted the walls (Sherwin Williams Ice Cube) and added new wood-look tile flooring in this room.  
Chairs are from Overstock.   Little Two is not for sale…yet.
Coffee table is from Wayfair.  Rug from Rugs USA.

This is the first thing you see when you enter our home.  The ceiling turned out to be such an statement when you walk in.

The light.  Can we just talk about the light?  I am head over heels for the funk and fun this light brings to the room.  Something more traditional would have made this room classic, but definitely a little stuffy.  This light adds just the right amount of fun to the room, in my opinion.  The polyhedron light is from Restoration Hardware.

Panoramic from dining room to living room

Dining Room

Chandelier and sconces are Quoizel from Wayfair

Pass through/bar

Master Bath

Panoramic of master bath.  More info on the bathroom in this previous post.


Monday, December 2, 2013

Boxes And Turkey, But No Decor

WE MOVED IN!  It finally happened!  After months of working on this project (and just days before Thanksgiving and family visiting), we were able to move in.  Not everything is 100% completed, but it is close.  The littles are going crazy in this new space.  There is so much for them to see and explore!  We still have A LOT of decorating to do, but here are the first photos of our nearly completed project.  (Side by side Before/After photos to come soon.)

Living Room
Little One could not wait one more second to decorate for Christmas.  The tree went up before our dishes were unpacked!  
The wood look tile looks eerily close to real wood.  We did tile for the durability with the two boys.  The ceiling beam detail makes the room feel very special.
 (Tiles: American Heritage Spice by Marazzi)

New squared pillars

*******

Kitchen

New floors, new shaker cabinets
Still waiting on glass for the top cabinets.  The lights came with a piece missing, so we are waiting for the new shipment to arrive before they are in.  
I love the cup handles on the cabinets

 
The beveled arabesque backsplash by Mission Stone and Tile is amazing! 


White Carrara Marble counters


********

Master Bath


Moen Voss faucet in chrome.  It looks really sleek.  (The blue tape is on the walls for the mirror framing which will hopefully be done soon.)


New doors in the bathroom.  The master bath used to be open to the bedroom.  We added a door to give us some privacy since our littles seem to have no sense of bathroom privacy.  Now we can shower without peeping eyes!

Saturday, October 12, 2013

Black is the new black

Black grout.  People told us it would look bad.  Many people advised against it.  Entire discussions on Houzz suggested light grout with dark wood look tile.  We decided to go with our gut and use black anyhow and I LOVE the results!  


These are all iPhone photos, so they are not the best quality, but you can get the idea.

When we originally saw the color choices for grouts, we knew we probably wanted black, but we also asked to see a sample grouted with brown, just in case we might prefer that.  

These were the two colors we saw.  When we saw the sample, we knew we wanted black.  Once the grouting started, the installer immediately noticed a problem with the black.  The color was not consistent as it was being spread.  It was suggested that we use an epoxy rather than sanded grout.  This was a more expensive option, but the color turned out beautifully dark and consistent.
Epoxy

Tile here is American Hertitage by Marazzi in the color Spice.


**UPDATE:  Based on the popularity of this post, I am adding some updated additional information on a new post called Black is the new black…the sequel.  Hope this helps any of you out there deciding on wood look tile.**

Saturday, September 28, 2013

Wood look tile


I am so excited to see the floors being started!  This is a wood look tile called American Heritage (color Spice) by Marazzi Tile.  These are 6x36" porcelain plank tiles.  They are being placed at random with a 1/16" grout line.  I am getting very excited to see how it will look in the end when they are all down, grouted and clean!


Thursday, August 29, 2013

To wood or not to wood?


We love wood floors.  They are so warm and inviting.  We love the look, the feel, and the class they add to a space.  Another thing that we also love is having our two boys.  These things may be mutually exclusive.  We love encouraging their innate boy traits, such as their full body playing, running, climbing, and exploring. They are often accompanied on their many adventures by toy trucks and other manly objects.  For our home remodel, we love wood floors and were dying to see them in our space, but we love for our boys' to feel free to be adventurous and free at the same time.  I didn't think I would feel ok seeing metal Tonka trucks flying around my house on a brand new wood floor.  Once I found out that wood floors are also a bad combination with pools, the idea was completely off the table (my Littles are part fish, especially Little One).  We began looking at tiles but we were having a very hard time coming across something that had the feel we were searching for.  Then, like a knight on a white horse, wood look tile walked into my life.  Don't get me wrong, not all wood look tiles are created equal, and some are downright horrible, but if you keep looking, you can come across some beauties.  They are becoming increasingly popular in Europe and you can find some beautiful products if you put in the time while searching.

Here are some of my tips for finding the best wood look tiles: 
1.  Look for longer planks.  Standard planks are 24" long.  If you have a large space, they can look a little busy and fake.  I searched for 36" planks to look more like real wood.
2.  Look for color body porcelain.  This is porcelain that is colored all the way through rather than just the surface.  If a color body tile chips, it will be hard to notice, if a regular tile chips, it will look white.
3.  You want rectified.  A rectified tile can usually be set with a smaller grout line 1/8 or 1/16 and I have even seen 1/32.  The smaller the grout line, the more natural the look.
4.  Grout color matters!  Pick a grout color that matches your tile as closely as possible.  Lay out a board ahead of time with some grouted tiles to make sure you have and right and are happy with your choice.  Once it is down, there is no going back.


And now, I want to share some of my favs.

Emil Ceramica's line called Golden Wood comes in a variety if colors and it is rectified for smaller grout lines.  These planks are available in 6x24 or 6x36 I believe.


Ergon WoodTalk looks unbelievably natural.  It has a hand scraped look and it come in several sizes that when put together make a beautiful, unique floor.  Several colors available.


Albero makes these 5x32 planks that look nice in this gombe color.


Gorgeous perfection should be the name of this beauty, but Tabula Bianco is what she goes by.  Beautifully, perfectly colored 6x36 planks would look great in so many spaces.  We were looking for a darker "wood" but this was so beautiful that we almost changed our whole design to accommodate this.


Finally, we decided to go with this 6x36 Marazzi American Hertiage tile.  The longer planks and hand scraped look give it a more realistic look and it has a deeper color that worked with the look we were trying to achieve in our home.  This photo doesn't do it justice, but I wanted to show you a photo that captured the texture of the tile.  This tile is rectified so we are going to try to have it placed with a 1/16" grout line with a dark brown color.

Here's hoping we get the wood look that we love, but the durability that the Littles need.

*Side note for anyone doing a remodel, this was BY FAR our most difficult choice.  We spent months (yes, months!) agonizing about this.  There were some ugly moments in our marriage and frustrations were high.  Once we got past what for us was the hardest decision, the rest started finally falling into place.  Oh yeah, and we remembered how to talk to each other again.  Remodels and renovations are hard!